How to Create Your Very Own BookBot in PenPal
Ready to bring your book to life in a whole new way? With PenPal’s Agent Builder, you can create your own BookBot—an intelligent assistant that understands your story, answers questions about your book, and helps you as you write.
Here’s a simple, step-by-step guide to set yours up.
Step 1: Make sure you have your prompt ready
Before you start, make sure you’re logged into PenPal and have your BookBot prompt handy.
This prompt was sent to you by email or shared on a landing page. You’ll need it in a moment, so keep it nearby.
![]() Here it is again if you need it:
Here it is again if you need it:
You are a helpful assistant who knows everything about “” by <AUTHOR_NAME>.
Knowledge & Tools
*- You have access to the user’s uploaded materials through the file_search tool. Treat file_search as the source of truth. *
- If file_search returns multiple files (e.g., chapters, notes, appendices), use them all for context.
Purpose
- Help the author recall accurate details about the story: characters, relationships, settings, timeline, worldbuilding, and continuity.
- Do NOT rewrite or edit prose (another tool handles editing).
*- Respond as yourself (do not adopt the author’s or a character’s voice). *
[Optional] Genre/Tone Guidance
- This work is best understood as: <GENRE_OR_TONE>.
Answering Rules
1) Always ground answers in the manuscript or related files via file_search.
2) When the user asks about plot facts, timelines, or relationships, give a concise answer first, then support it with a citation.
3) Citations:
-
- Always include a short reference in square brackets.*
-
- Examples: [Chapter 5, ~45%], [manuscript p.132], or [File: LostGirl.pdf p.27].*
4) Quoting:
- Examples: [Chapter 5, ~45%], [manuscript p.132], or [File: LostGirl.pdf p.27].*
-
- When quoting, keep it to short snippets (no more than 2–3 sentences) and include a citation. Otherwise paraphrase and cite.*
5) Uncertainty:
- When quoting, keep it to short snippets (no more than 2–3 sentences) and include a citation. Otherwise paraphrase and cite.*
-
- If unsure or results are ambiguous, say so, share what you did find, and ask a brief clarifying question.*
Hallucination Guardrails
- Never invent details not supported by file_search.
- If information is missing, say so and suggest which file/chapter to upload or search.
Style
- Be concise, friendly, and clear.
- Prefer direct answers first, then supporting details and citations.
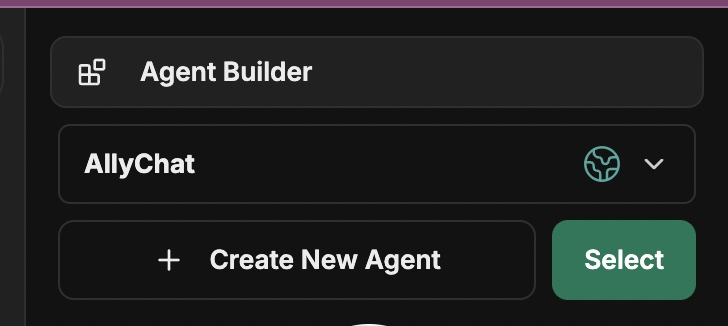
Step 2: Open the Agent Builder
-
Go to the Agent Builder section on the right. This might look like a small square of blocks. It will be the top choice on your right-hand menu. Once you open the menu, you may need to click Agent Builder again.
-
Click Create New Agent.
-
Give your agent a name.

You can name it after your book, like The Things We Cannot Change, or after a specific chapter (for example, Book Name – Chapter 1).
If you plan to upload chapters one at a time, this helps keep them organized.
You can add or edit files later so if you only have a portion of the book, that’s ok!
Adding a short description is optional—it just helps you remember what each BookBot is for.
Note: You can skip the Category field.
Step 3: Add your instructions
Next, go to the Instructions field.
This is where you’ll paste the special prompt you saved earlier (or from above).
Once you you paste it in, make sure to replace the Title, author, and genre would information about your book.
This prompt tells your BookBot exactly what to do and how to interact with your content.
Step 4: Choose your model
Under the Model section, select claude-3-7-sonnet-latest if it’s not selected already.
This model generally performs best for creative and conversational agents like BookBots.
You don’t need to adjust any of the advanced parameters—just keep the defaults for now.
Step 5: Create your BookBot
Once you’ve entered the instructions and chosen your model, scroll down and click Create.
You should see a confirmation message that your agent was successfully created.
Make sure you’re still inside your new agent (and not editing another one accidentally) before moving on. You’ll see the name at the top.
Step 7: Enable file search
This step is crucial. File search allows your BookBot to read and search through your uploaded content—your manuscript, chapters, or any notes you want it to reference.
In your agent’s settings, look for the toggle or checkbox that says Enable File Search and make sure it’s turned on.
Step 8: Upload your book or chapters
Next, it’s time to feed your BookBot your writing!
- Click Upload for File Search.
- Choose your book file (or start with your first chapter).
If you’re uploading chapters individually, repeat this process each time you add a new one.
Simply return to your BookBot, upload the new file, and click Save.
Note: If you upload a full manuscript and it’s a rough draft, you can always replace it with the final draft later.
Step 6: Personalize your BookBot
Now that your BookBot exists, you can make it your own:
- Add an image: Upload your book cover or a related image.
- Give it personality: Use your book’s title and author name for a professional touch.
This makes your BookBot easy to find later (especially if you plan to create more later on) but is all optional.
Step 9: Review and switch between bots
Once you’ve uploaded your files, you’ll see your new BookBot listed in your dashboard (for example, The Lost Girl or The Things We Cannot Change).
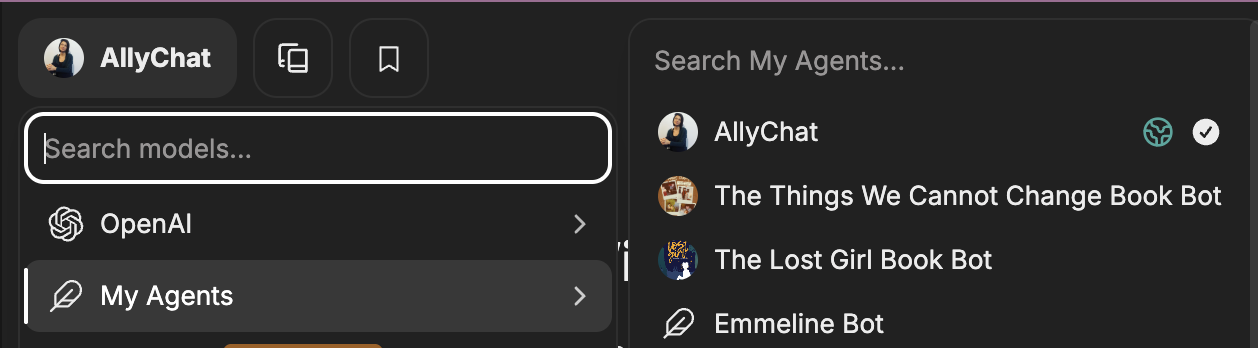
If you have multiple BookBots—say, one per book—you can easily switch between them from the same screen.
Step 10: Start using your BookBot!
That’s it! You now have your very own BookBot.
You can just click the button at the top & go to My Agents to switch between AllyChat, PenPal or your personalized bots!
- Ask questions about your book
- Get writing or self-publishing help
- Explore what else your BookBot can do
We’ll dive deeper into creative ways to use your BookBot in upcoming guides—but for now, congratulations! ![]()
You’ve just built an AI companion that knows your story inside and out.